Burn sugar on Crème Brûlée without a torch might sound challenging, but it’s surprisingly simple with the right techniques. Whether you’re using an oven broiler, a heated spoon, or creative stovetop methods, you can achieve that signature caramelized crust without special tools. Discover these easy, foolproof methods to elevate your homemade Crème Brûlée to restaurant-quality perfection!
Table of contents
How to Burn Sugar on Crème Brûlée Without a Torch
Crème Brûlée, a classic French dessert, is renowned for its silky custard base and signature caramelized sugar crust. Traditionally, a kitchen torch is used to create that irresistible caramel layer. But what if you don’t own one? Don’t worry—there are alternative methods to burn sugar on Crème Brûlée without a torch that work just as effectively. Let’s explore these techniques and get your dessert ready to impress!
Understanding the Perfect Crème Brûlée Caramelization
Caramelization is the process that transforms sugar into a glossy, golden-brown layer when exposed to heat. This reaction not only enhances the appearance of Crème Brûlée but also enriches its flavor profile with notes of nuttiness, slight bitterness, and depth that balance the creamy custard beneath. Achieving the perfect caramelization requires an understanding of how sugar behaves under heat:
- The Science Behind Caramelization:
Sugar begins to melt at around 320°F (160°C) and caramelizes between 340°F (170°C) and 370°F (190°C). Heating beyond this range risks burning the sugar, leading to a bitter, unpleasant taste. - Key Characteristics of a Good Crust:
- Uniformity: The crust should be evenly browned without darker or raw spots.
- Thickness: A thin but sturdy layer is ideal to achieve the “crack” without overpowering the custard.
- Timing: Caramelization should occur quickly to prevent reheating and softening the chilled custard underneath.
- Types of Sugar to Use:
- Granulated Sugar: Most commonly used, offering a balanced melt and caramelization.
- Caster Sugar: Its finer texture allows for more even melting and faster caramelization.
- Brown Sugar: While adding a molasses flavor, it’s harder to caramelize evenly and often requires additional attention.
Understanding these factors ensures you’re set up for success, no matter which method you choose to burn sugar on Crème Brûlée without a torch.
Alternative Ways to Burn Sugar on Crème Brûlée Without Torch
While a torch is the traditional tool for achieving that iconic caramelized sugar crust on Crème Brûlée, there are several alternative methods that are just as effective. Whether you’re a beginner or a seasoned baker without a torch, these methods allow you to create a beautifully caramelized dessert with tools you likely already have in your kitchen. Let’s break down each approach in detail to help you choose the one that best fits your needs.
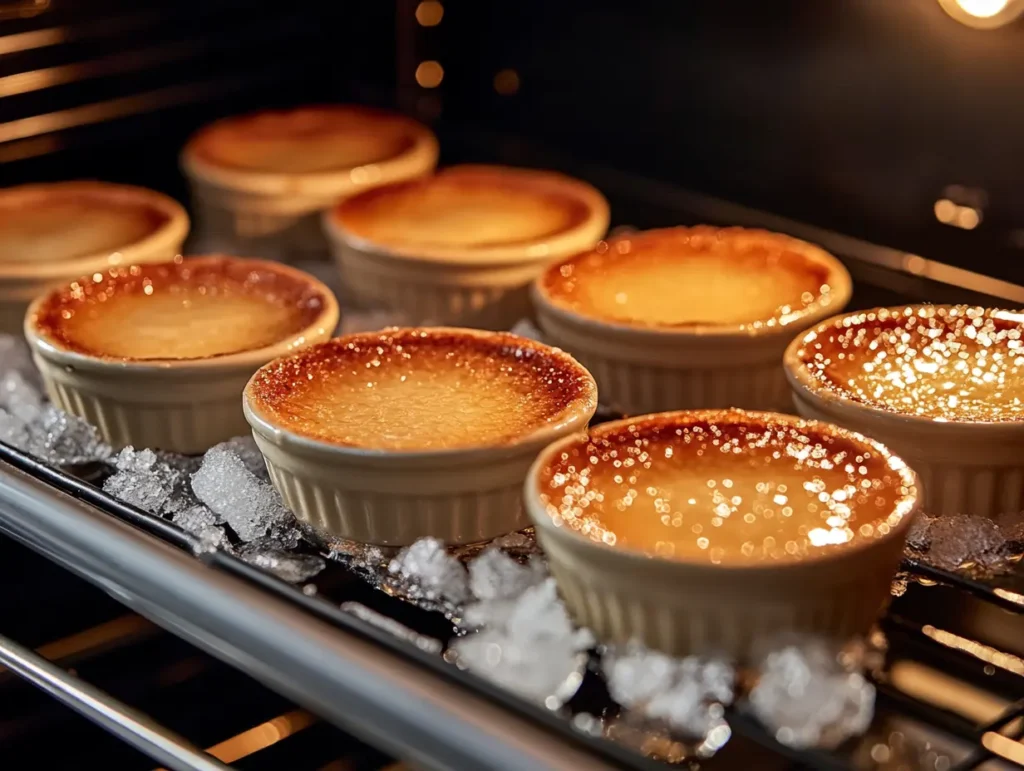
Method 1: Using the Oven Broiler to Burn Sugar on Crème Brûlée Without Torch

The broiler is one of the most convenient alternatives for caramelizing sugar. Found in almost every household oven, it provides intense heat from above, making it ideal for melting sugar into a golden crust.
- Step-by-Step Process:
- Prepare the Custard:
After chilling your Crème Brûlée, sprinkle a thin and even layer of sugar over the surface. Fine sugar is best for even caramelization. - Position Ramekins:
Place the ramekins on a baking sheet and arrange them so they are evenly spaced. If possible, surround the ramekins with crushed ice or ice water to keep the custard cool during the process. - Preheat the Broiler:
Set your oven to broil, ensuring the rack is positioned 2–3 inches from the broiler element. Preheating is essential to create immediate caramelization. - Broil the Sugar:
Place the baking sheet under the broiler and keep a close eye on it. The sugar will start to melt within a minute and caramelize shortly after. Rotate the tray if necessary for even browning. - Cool and Serve:
Once the sugar has caramelized to a golden-brown color, remove the ramekins from the oven. Let them cool for a few minutes to allow the sugar to harden before serving.
- Prepare the Custard:
- Tips for Success:
- Watch Closely: Sugar caramelizes quickly under a broiler and can burn in seconds. Keep the oven light on and monitor constantly.
- Use Thin Layers: A thinner layer of sugar melts and caramelizes more evenly.
- Rotate for Evenness: If your oven broiler has uneven heat distribution, rotating the tray can ensure all ramekins caramelize evenly.
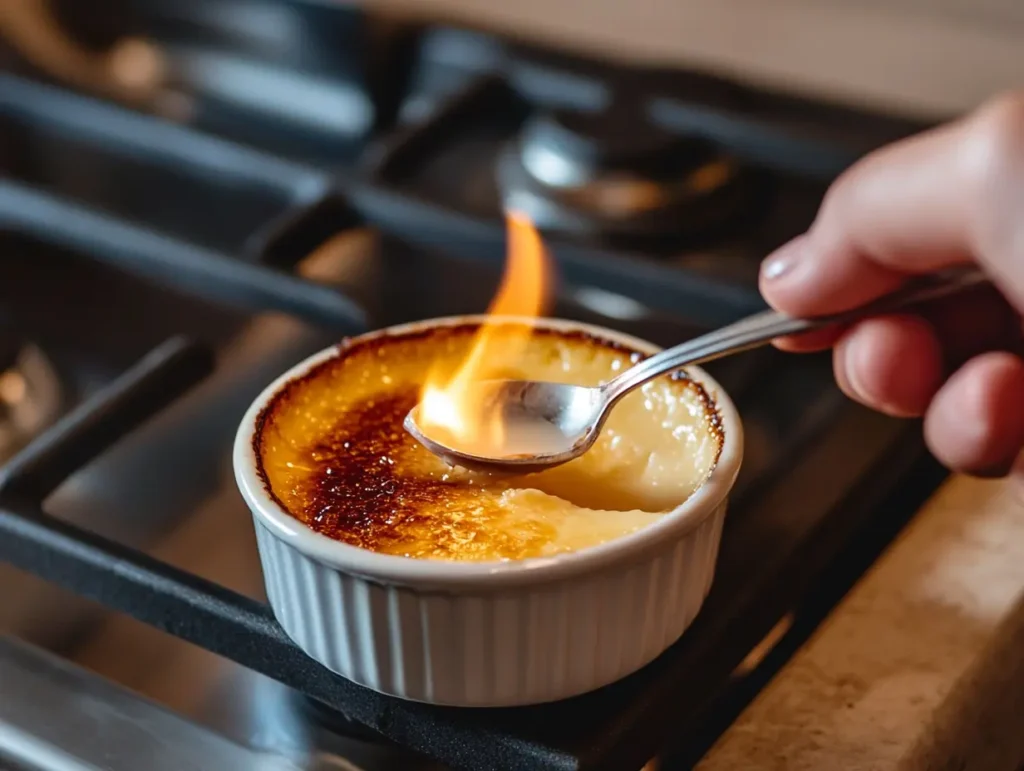
Method 2: Burn Sugar on Crème Brûlée Without Torch Using a Metal Spoon

Using a heated metal spoon is an old-fashioned but effective way to caramelize sugar when you don’t have a torch.
- How It Works:
A metal spoon is heated over a direct flame or heat source until it becomes extremely hot. The hot surface of the spoon is then pressed against the sugar layer to create caramelization. - Step-by-Step Process:
- Prepare the Custard:
Chill the Crème Brûlée and sprinkle a thin layer of sugar evenly across the surface. - Heat the Spoon:
Hold a large metal spoon over a gas flame or electric stove burner until it’s glowing hot. If using a candle or other flame, ensure the spoon is evenly heated. - Caramelize the Sugar:
Gently press the heated spoon onto the sugar layer, moving it around to cover the entire surface. The heat from the spoon will instantly melt and caramelize the sugar. - Repeat as Needed:
Reheat the spoon as necessary to complete the caramelization process for all ramekins.
- Prepare the Custard:
- Advantages:
- No specialized equipment is needed.
- Allows for precise caramelization in specific areas.
- Tips for Success:
- Use a sturdy metal spoon with a heat-resistant handle to avoid burns.
- Be cautious not to press too hard, as this can disrupt the custard.
Method 3: Burn Sugar on Crème Brûlée Without Torch in a Sauté Pan
This method involves melting sugar in a sauté pan on the stovetop and pouring it over the custard.
- Step-by-Step Process:
- Melt the Sugar:
Add granulated sugar to a heavy-bottomed sauté pan and heat over medium-low heat. Stir gently with a silicone or wooden spatula until the sugar melts into a smooth, golden caramel. - Pour Over Custard:
Quickly but carefully pour the melted sugar onto the chilled Crème Brûlée, tilting the ramekin to spread the caramel evenly across the surface. - Cool and Harden:
Allow the caramel to cool and harden for a few minutes before serving.
- Melt the Sugar:
- Advantages:
- Provides a smooth, glossy caramel layer.
- Offers complete control over the caramel’s color and consistency.
- Tips for Success:
- Work quickly, as melted sugar hardens rapidly once removed from heat.
- Use a silicone spatula for stirring to prevent sticking.
- Avoid overheating the sugar, as it can burn easily and develop a bitter taste.
Method 4: Using an Electric Stove Coil
If your kitchen has an electric stove with exposed coils, you can utilize the coils’ direct heat for caramelizing sugar.
- Step-by-Step Process:
- Prepare the Custard:
Sprinkle an even layer of sugar on the surface of your Crème Brûlée. - Preheat the Coil:
Turn the coil to a medium setting and allow it to preheat until glowing red. - Caramelize the Sugar:
Hold the ramekin just above the coil, rotating it gently to evenly melt and caramelize the sugar. - Cool and Serve:
Allow the caramel to harden for a few minutes before serving.
- Prepare the Custard:
- Advantages:
- Leverages an existing appliance without the need for additional tools.
- Creates an even caramelization when rotated properly.
- Tips for Success:
- Use heat-resistant gloves or tongs to handle the ramekin safely.
- Keep the ramekin moving to avoid burning specific spots.
Method 5: Creative Alternatives
If none of the above options suit you, consider these innovative approaches:
- Blow Dryer: Use a hairdryer with a high-heat setting to gently melt and caramelize the sugar.
- Infrared Heat Gun: Designed for DIY projects, this tool can provide controlled heat for precise caramelization.
- Barbecue Lighter: Though unconventional, a long barbecue lighter can be used in a pinch to target small areas of sugar.
Each of these methods provides flexibility and creativity for achieving the perfect caramelized sugar crust. No matter the tools available, you can enjoy the satisfying “crack” of Crème Brûlée without a torch.
Ingredients for the Perfect Crème Brûlée
Here’s a quick list of what you’ll need to make Crème Brûlée:
- Heavy cream
- Vanilla bean or extract
- Egg yolks
- Granulated sugar
- Fine sugar (for the caramel crust)
Step-by-Step Recipe for Crème Brûlée
Ingredients
- 2 cups heavy cream
- 1 vanilla bean (or 1 tsp vanilla extract)
- 5 large egg yolks
- 1/2 cup granulated sugar
- 2 tbsp fine sugar (for caramel topping)
Instructions
- Preheat Oven:
- Preheat your oven to 325°F (165°C).
- Heat the Cream:
- In a saucepan, combine the cream and vanilla. Heat gently until steaming, but do not boil.
- Prepare Egg Mixture:
- In a bowl, whisk the egg yolks and sugar until pale and smooth.
- Combine:
- Gradually pour the warm cream into the egg mixture, whisking constantly to prevent curdling.
- Strain and Pour:
- Strain the mixture to remove any lumps, then pour it into ramekins.
- Bake:
- Place the ramekins in a baking dish and add hot water to the dish until it reaches halfway up the sides. Bake for 40–50 minutes or until the custard is just set.
- Chill:
- Remove from the oven, cool to room temperature, and refrigerate for at least 4 hours.
- Caramelize the Sugar:
- Use one of the torch alternatives above to achieve a golden crust.
Nutritional Information (Per 100g)
| Nutrient | Amount |
|---|---|
| Calories | 210 |
| Total Fat | 16g |
| Saturated Fat | 10g |
| Cholesterol | 140mg |
| Sodium | 35mg |
| Total Carbohydrates | 15g |
| Protein | 3g |
Advanced Tips for a Perfect Sugar Crust
Achieving the perfect sugar crust on Crème Brûlée requires precision and attention to detail. While the methods described above provide the techniques, mastering the finer points of sugar caramelization can elevate your dessert to a professional level. Below are detailed tips and strategies to ensure your sugar crust is flawless every time.
1. Choosing the Right Sugar for Caramelization
The type of sugar you use significantly affects the final result. Different sugars behave differently under heat, so selecting the right one is essential:
- Granulated Sugar:
- The most common choice, granulated sugar is affordable, readily available, and produces a consistent caramelization.
- Works best for the oven broiler or metal spoon methods.
- Caster Sugar (Superfine Sugar):
- The finer grains of caster sugar melt more quickly and evenly, reducing the risk of burning.
- Ideal for techniques requiring even heat distribution, like using a sauté pan.
- Brown Sugar:
- While adding a rich molasses flavor, brown sugar is denser and may caramelize unevenly.
- It’s better suited for methods involving direct heat, such as the broiler or a heated spoon.
- Turbinado Sugar:
- This coarser sugar adds a unique crunch but requires more time to melt and caramelize evenly.
- Best used with high-heat methods like the broiler or stove coil.
2. Preparing the Custard Surface
The condition of the custard before adding the sugar layer plays a crucial role in achieving a perfect crust.
- Dry the Surface:
- Before sprinkling sugar, gently pat the custard’s surface with a paper towel to remove any condensation.
- A dry surface ensures the sugar adheres evenly and caramelizes properly.
- Chill Thoroughly:
- Ensure the custard is fully chilled before caramelizing. A cold custard keeps the sugar layer from melting prematurely and maintains the creamy texture underneath.
- Level the Custard:
- If the custard has an uneven surface, smooth it out with the back of a spoon for a uniform sugar layer.
3. Applying the Sugar Layer
The way you sprinkle sugar affects its ability to caramelize evenly:
- Thin and Even Distribution:
- Use a fine mesh sieve to sprinkle sugar in a uniform layer across the custard. This prevents clumps and ensures consistent melting.
- Aim for a layer no thicker than 1–2 millimeters.
- Two-Layer Technique:
- For added texture, apply a second layer of sugar after the first has been caramelized. This creates a thicker, more satisfying crunch.
4. Controlling Heat for Optimal Caramelization
The heat source and its intensity determine how evenly and quickly the sugar caramelizes:
- Gradual Heating:
- Begin with a medium heat setting and increase gradually to prevent burning. This is especially important for methods involving direct flame or a broiler.
- Avoid Overheating:
- Sugar can quickly go from golden brown to bitter and burnt. Once it reaches the desired color, remove it from the heat immediately.
- Use Ice Baths:
- Placing ramekins in an ice bath during caramelization protects the custard from softening while allowing the sugar to melt evenly.
5. Creating an Even Golden Crust
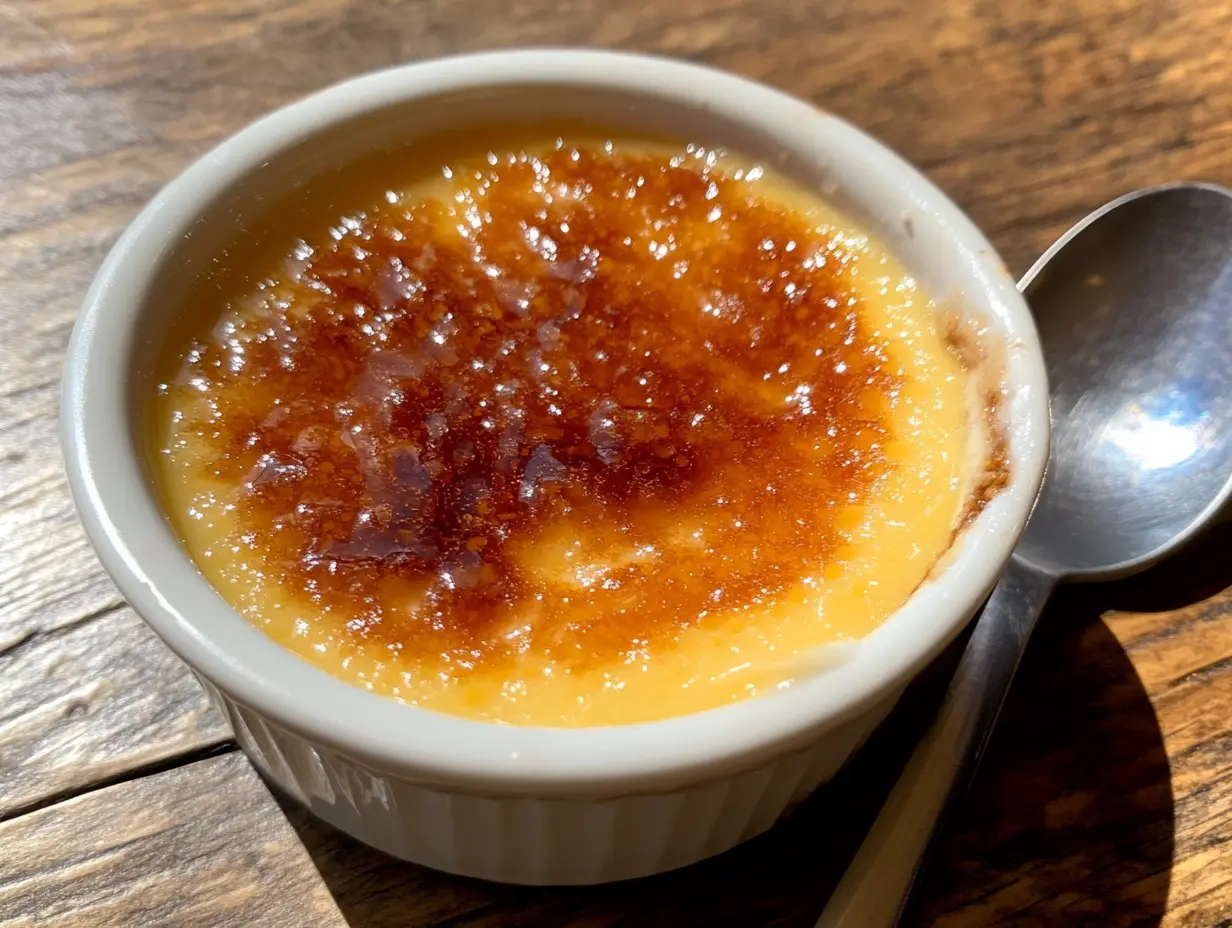
The hallmark of a perfect Crème Brûlée crust is its even, golden-brown color without burnt spots or raw sugar patches. Here’s how to ensure uniformity:
- Rotate the Dish:
- Whether using a broiler, stove coil, or torch alternative, rotate the ramekins frequently to expose all areas of sugar to the heat source.
- This prevents uneven caramelization and ensures a consistent result.
- Adjust Timing Based on Sugar Type:
- Fine sugars caramelize faster, while coarse sugars need more time. Adjust your timing accordingly to avoid under- or over-caramelizing.
6. Enhancing the Crust’s Flavor Profile
Caramelization is an opportunity to add subtle flavor nuances to your Crème Brûlée:
- Infused Sugars:
- Mix granulated sugar with a pinch of cinnamon, cardamom, or citrus zest for a flavorful twist.
- Allow the sugar to dry completely before sprinkling it on the custard to ensure even caramelization.
- Salted Caramel Crust:
- After caramelizing the sugar, sprinkle a pinch of sea salt over the crust. The salty contrast enhances the sweetness and depth of the dessert.
7. Troubleshooting Common Issues
Despite careful preparation, things can occasionally go wrong. Here’s how to address common sugar caramelization challenges:
- Sugar Won’t Melt:
- If the sugar isn’t melting evenly, it may be too thick. Remove excess sugar and try again with a thinner layer.
- Burnt Sugar:
- Caramelized sugar turns bitter when burnt. Always watch the process closely, especially under a broiler, and remove the heat as soon as the sugar turns golden brown.
- Uneven Caramelization:
- Rotate the ramekins frequently, and ensure an even sugar layer before applying heat.
- Soft or Sticky Crust:
- If the caramel layer is too soft, it wasn’t heated long enough. Place it back under the broiler or reapply heat for a few more seconds.
8. Storing Crème Brûlée with a Perfect Crust
If you’re preparing Crème Brûlée ahead of time, it’s best to caramelize the sugar just before serving. However, if you need to store it:
- Covering the Dessert:
- Place the ramekins in an airtight container or cover with plastic wrap.
- Avoid placing plastic wrap directly on the caramelized sugar, as it may soften the crust.
- Re-Crisping the Crust:
- If the crust loses its crunch, you can re-caramelize it by adding a thin layer of sugar and applying heat again.
Mastering these advanced tips will ensure your Crème Brûlée is not only visually stunning but also delivers the perfect texture and flavor balance. By understanding the nuances of caramelization and following these techniques, you’ll impress guests with every crack of that golden crust!
FAQs about Burn Sugar on Crème Brûlée Without Torch
What is the best sugar for Crème Brûlée?
Fine sugar works best for creating an even caramel crust. Avoid coarse sugar as it may not melt evenly.
Can I make Crème Brûlée ahead of time?
Yes! Prepare the custard a day in advance. Caramelize the sugar just before serving for the best results.
Can I use brown sugar for the topping?
While possible, brown sugar is harder to caramelize evenly and may not achieve the desired crunch.
Why is my sugar not caramelizing?
If the sugar doesn’t melt, it might be too thick. Use a thin, even layer of fine sugar.
How do I store leftovers?
Cover with plastic wrap and refrigerate. Consume within two days for the best texture and flavor.
Is Crème Brûlée gluten-free?
Yes, this dessert is naturally gluten-free!
Conclusion :Burn Sugar on Crème Brûlée Without Torch
Creating that caramelized sugar crust without a torch is easier than you think! Whether you use your oven broiler, a heated spoon, or a sauté pan, each method provides a delightful result. Now, you can enjoy Crème Brûlée anytime, no special tools required. Impress your family and friends with this timeless dessert that’s as fun to crack as it is to eat!
